October 1, 2016

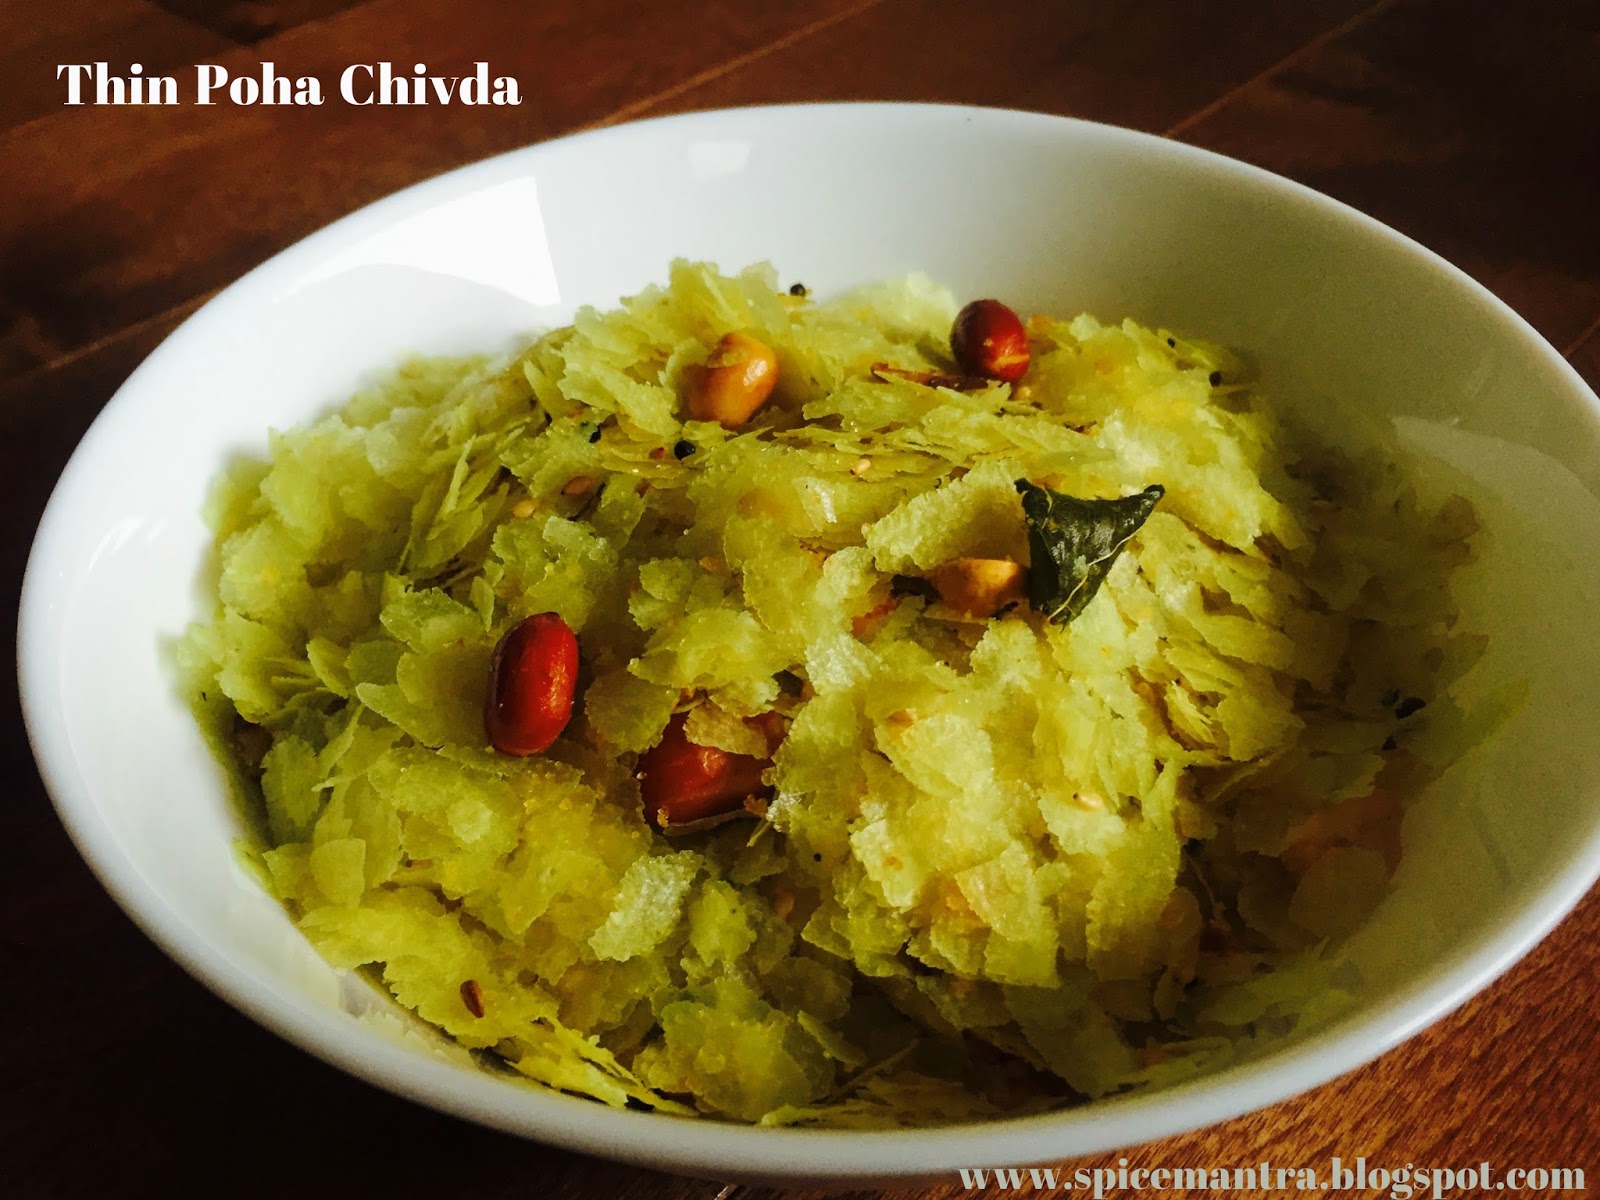
Thin poha (or thin beaten rice) Chivda aka snack in english

When we say snack in India, we get the visuals of lots of different home made Chivdas (mix). There are so many different varieties of them. Corn flakes, Puffed rice flakes (chirmura, murmura), beaten rice flakes, Sago (sabudana) and the list is endless. I am sure different states would be making snacks in different styles from these very primary ingredients. I am going to share the very basic Chivda made from beaten rice thin flakes. This one is quick, there is no deep frying involved, so its a guilt free snack and I love it.


Ingredients:

Thin poha pack from Indian
grocery store
1. Thin poha 2 lbs, get this in any Indian grocery store.
2. Peanuts 1/2 cup
3. Roasted Chana daal - 1/2 cup
4. Sesame seeds - 1 tbsp
5. Dry coconut flakes
6. Green chilies 3-4, depending upon how hot they are and your liking, chopped horizontally
7. Salt and sugar as per taste
8. Oil - 3-4 tbsp.
9. Curry leaves - 10-12
10. Mustard seeds and cumin seeds each 1 tbsp\
11. Turmeric powder 1/2 tsp
12. Asafoetida or "hing" - a pinch
13. Cashew-nuts - 1 tbsp (optional)

Have all the ingredients ready in a plate as you would need them quickly during making of the chivda.


Method:

1. First you have to roast the thin poha, so that they become crisp. To do this, simple put the poha a little at a time in a microwave safe bowl. Heat for 30 seconds and then mix the poha and heat again for 30 seconds. Try a little to make sure they are crisp. You will definitely feel the difference between undone and done poha flakes. If not may be you need to heat them 30 seconds more.

2. After this, heat oil in a pan and once heated add mustard seeds. When they splutter add hing, cumin seeds, curry leaves, Add peanuts, mix it well, Then add chana daal, mix and after few seconds add coconut, cashews, chilies and sesame seeds. Peanuts take more time than coconut to turn red. Make sure you are not turning any one ingredient more red or they will not taste as good.

3. Once coconut are red, add turmeric powder, salt, sugar , mix it for few seconds until l salt and sugar dissolve a bit.

4. Add the poha and mix everything properly, All the white poha  flakes should get covered with the oil mixture so that it taste evenly. Mix for a while on a low flame. Adjust sugar and salt as per taste and the poha chivda is ready.

Tips:

1. You can give this as a snack for kids in school
2. This makes an excellent tea time snack, make sure you top it with chipped onion.
3. You can also make this in Diwali.

August 24, 2016

Hridhaans 2nd Birthday Cake !!!

Birthday decoration is no fun, but I am always excited to decorate the cake. I feel taking this extra effort is a way to convey your love to your kid. I am sure like me you and many other moms feel the same. :)


Here are some pictures of his 2nd birthday cake.


First one is a simple birthday cake pendant. I got some pendant free prints online. Used some threads to put them together and the barbeque skewers to tie them too. It was fun to make this one. So many things you can hand in there. Animal cut outs, photos, numbers etc.


2) Here is the cake I decorated. Simple isn't it. I got wilton's butter cream and used it to top the cake.
Then added some food colors, used the plastic bags and decorating tips to decorate the border and the dots on the cake. In the middle I used the sprinkles to make the number 2. I used a paper cutting for the number 2, placed it on top of the cake and then sprinkled to get that number. I think its super easy trick :). You can do it with dried colored coconut flakes too or different kinds of sprinkles.


This time we celebrated the birthday by going to a Zoo. What else a 2 year old need anyways ;)


February 8, 2014

Quick and Easy, Colorful Bell Pepper Mix !!!

Diets are really hard. First it restricts so many ingredients and then you come to know that there are very little food dishes that you can really eat if you want to follow this diet. :). And I really wanted to follow this diet I did last year. I guess this was my first diet program ever and I was really excited.


I was on a non-grain diet and non-grain means you cannot have rotis. So apart from salads, I usually had moong daal cheelas as a replacement to rotis. But moong daal cheela did not taste good with various sabjis and hence I used to prepare and mix, quick and dry vegetable saute, make my cheelas and then have meal. This sabji of different capsicums tasted really well with cheelas and it made my meals more satiating during that diet.

Ingredients:


Serves 2

Bell Pepper - I used 4 colored bell peppers (Red, Yellow, Orange, Green), diced, 1 and 1\2 cup
Onion - diced, 2 tbsp
Tomatoes - chopped, 2 tbsp
Potatoes - 1 medium sized, cooked in microwave for 2-3 minutes, peeled and diced
Chopped fresh Coriander\Cilantro - 1 tbsp.
Cumin and Mustard  - Each 1 tsp seeds for tempering
Garam Masala - 2 tsp
Red Chili powder - 1 tsp or as per taste
Sugar - Pinch to taste (optional)
Salt to taste
Oil - 3 tsp


Method:


1. Mix and microwave chopped capsicum for 3-5 minutes, to semi-cook it.. Heat oil in a pan and add mustard seeds, When they splutter add cumin seeds. Now add chopped onions. Saute for a minute or two.

2. Now add the capsicum, potato, tomato and mix. Add salt, garam masala, red chili powder, sugar and mix again.Cook untill capsicums are soft but not soggy.

3. Adjust masalas and top with chopped coriander. Serve hot with plain Roti or plain Paratha.


Tips:


  • Make this sabji right before you are going to have your meal. 
  • It will only taste better when you have at least 3 different kinds of bell peppers. The colors also add to its nutrition and presentation.

January 1, 2014

Running out of options for breakfast - try this, "Sevai Upma" (Vermicelli Mix)

Sevai is a tricky item to work with. I had about 4-5 failed attempts of Sevai upma before I could make it right. This is usually a rare dish people make, at least I have not seen people make Sevai upma as frequently they do Poha or regular Upma for breakfast. This, therefore makes, a good dish for guests too. The only tricky part is how much water you put when you cook Sevai upma and the lesson I learnt is to start with small amounts or try the microwave version of cooking it.

Ingredients:

Thin Vermicelli \ Sevai - 2 cups
Chopped Onion - 1\2 cup
Frozen Peas - 1\2 cup
Green chillies - either slit or in a paste form, as per taste
Roasted Peanuts - whole or crushed
Salt per taste
Sugar - 1 tsp
Mustard Seeds - 1 tsp
Cumin Seeds - 1 tsp
Curry leaves - 3\4
Turmeric Powder - 1 tsp
Oil - 3 tsp
Chopped Coriander

Method:

1. Put vermicelli in a microwave safe bowl. Add 1 tsp oil to it and mix it so that all sevai is greased. Microwave this for 1-2 minutes stirring every 30 seconds. Stop when you see the sevai getting red. Add 1\2 cup water to this bowl and then continue cooking. You will require 2-3 minutes for the vermicelli to be cooked. Add water if necessary. Eat a little sevai to check if its cooked.

2. Heat oil in a skillet and add mustard seeds. When they splutter add cumin seeds and curry leaved. Add chopped onion and saute till onion turns translucent. Add turmeric powder, green chilly paste\slit, peanuts (whole\crushed), salt, sugar and mix well.


3. Now add cooked vermicelli and mix again delicately, making sure everything mixes well. Adjust salt, sugar to taste. Cover for 2 minutes. Garnish with chopped cilantro.

Tips:

You can also add roasted split chana daal when sauteing onion, for that extra and different flavor.
Additional veggies of your choice will add colors and nutrition.

February 4, 2013

All I wanted to know about Antioxidants!

I been upto a lot of things lately and definitely this is not the post I want to resume my writing with.
I was reading about Green Teas (as I have started drinking it instead of regular tea) and that directed me to read about antioxidants. This topic, like many others, had always been dwelling in my mind but its just today that it surfaced and I thought this is good to write about.

I want to write down about it in the language that I can clearly remember and explain others.

What is oxidation:

What I knew - Rusting of iron or a peeled apple turning red is related to oxidation. So definitely oxidation is a chemical reaction, that is related to oxygen (as the name suggests) and could be slower or a faster process. Definitely it is not good as nobody likes a rusted iron or a peeled apple that had turned red. :)

What I learnt - Oxidation never occurs on a painted iron object or not on the Apple that has skin, which means, it occurs when some kind of cells\molecules come in contact with oxygen. As we know any burning process requires Oxygen and so does the food (glucose) in our body requires oxygen to ignite itself and generate energy that body requires for functioning. We also burn the energy resulting into heat that can damage cells. This process is nothing but oxidation.
The damaging of the cells actually occurs because of the electrons that are generated during these reactions of molecules and oxygen. These free electrons are also called as free radicals.

Prolonged damaging of cells can cause serious injuries.
 
Effects of Oxidation:

What I knew - Nothing

What surprised me - As the oxidation\burning can occur anywhere in the body, the effects could also been at any place or of any kind. Here is the list which is literally shocking and if we correctly know how tackle the oxidation we can at least eliminate a good chance of these disease ever happening and lead a healthy life. (source- http://www3.amherst.edu/~dmirwin/Reports/BetterHealth.htm)
  • Deterioration of the eyes, which contributes to blindness.
  • Inflammation of the joints (rheumatoid arthritis).
  • Damage to nerve cells in the brain.                   
  • Acceleration of the ageing process.
  • Increased risk of coronary heart disease, since free radicals encourage low density lipoprotein (LDL) cholesterol to adhere to artery walls.
  • Certain cancers, triggered by damaged cell DNA.

What are antioxidants ("free radical scavengers"):

What I knew - I should eat antioxidants like berries to have healthy life.
 
What I learnt - These are the chemicals that are responsible for removing the free radicals that cause disease. Many vitamins act as antioxidants. Antioxidant supplements do not work as well as the natural sources of them found in vegetables, fruits, etc.
Antioxidants block the process of oxidation by neutralizing free radicals and themselves become oxidized. That is why there is a constant need to replenish our antioxidant resources.
 
Sources of antioxidants:
 
Type
Source
Allium sulphur compounds
Leeks, onions and garlic.
Anthocyanin
Eggplant, grapes and berries.
Catechins
Red wine and Tea.
Cryptoxanthins
Red capsicum, pumpkin and mangoes.
Flavonoids
Tea, green tea, citrus fruits, red wine, onion and apples.
Indoles
Cruciferous vegetables such as broccoli, cabbage and cauliflower.
Isoflavonoids
Soybeans, tofu, lentils, peas and milk.
Lignans
Sesame seeds, bran, whole grains and vegetables.
Lutein
Leafy greens like spinach, and corn.
Lycopene
Tomatoes, pink grapefruit and watermelon.
Polyphenols
Thyme and oregano. Grapes, all berries
Beta carotene
Pumpkin, mangoes, apricots, carrots, spinach, parsley.
Vitamin C
Oranges, blackcurrants, kiwi fruit, mangoes, broccoli, spinach, capsicum and strawberries.
Vitamin E
Vegetable oils (such as wheat germ oil), avocados, nuts, seeds and whole grains.
Copper *
Seafood, lean meat, milk and nuts.
Selenium *
Seafood, offal, lean meat and whole grains.
Manganese *
Seafood, lean meat, milk and nuts.
Zinc *
Seafood, lean meat, milk and nuts.

* Need only in small amounts.
 
  • Know it right and do it right !

May 12, 2012

Schezwan Fried Rice

Finally after lots of visits to the Indian store, last week I could get a bottle of Schezwan Sauce. Ohh I thought I got lucky. Haha not really, a friend of mine told me that she got one and hence I ran the other day to grab one for me. I am not sure if this is something which is also found in China but in India its popular in making of a Chinese food. One can make this at home as well but I prefer this ready made version ;).

I wanted to make Schezwan noodles but somehow my taste buds craved for the rice.


Ingredients:

Basmati or regular Rice: 2 Cups, Cooked

Vegetables that go in Chinese food like Carrots, Capsicum (red and green), cabbage, onion, broccoli florets. The quantity can vary as per liking. Some people like more veggies some do not. Some do not like broccoli, so its optional. But carrots, capsicum and onion are the must to have).
Fresh Firm Tofu : 7-8 Cubes
Garlic : 3 cloves, finely chopped
Soy Sauce: 2-3 tsp
Schezwan Sauce : 2 tbsp
Siracha, red chili sauce: as per taste
White Vinegar: 2-3 tsp
Spring onion: Greens for garnishing, whites mix with other veggies
Salt: per taste
Oil


Method:

1. Break the Rice lumps and separate all the grains. (For this, put some oil into the rice while cooking it and do not cook it in pressure cooker. Use either microwave or cook directly on the burner. Use rice after it cools down completely).

2. Dice onion , wash broccoli florets, chop spring onion, and julienne rest of vegetables.

3. Shallow fry the tofu cubes to maintain its firmness after adding them to the rice.

4. Heat oil in a pan and add onions, garlics, Saute for few seconds and then add other vegetable. Saute for a while but make sure you main the crispness of the vegetables. The crunchiness tastes better than the softer version of the veggies.

5. Now add sauces and vinegar. Saute again.

6. Add tofu and mix delicately.

7. Now add the rice and salt and mix everything well. Adjust the sauces.

8. Cook for 2 minutes and garnish with spring onion greens.

Tips:


You can cover tofu with cornflower paste and then shallow fry, but its optional.

April 7, 2012

Wiltons Cake Decorating Class

              Its time to share what I was doing for the past whole month. Since I got busy now on weekdays (due to my job, obviously) all I am left are only weekends to write new posts. And when it gets to weekend my body joints start yelling at me and ask me not to do any work. Precisely I get too lazy. But my love towards my blog gets my hands working and I get motivated to write something.


Well for the last month I did not post any thing. And that's only because I was busy even on weekend. It was Wilton's Cake Decorating Class. Oh man it was fun learning experience. And I am going to share it here.


Many of you might have already taken this class , heard about it or are right now wondering who is Wilton....!!!  :) Well lets start with it then.


Wilton is a number one Cake Decorating company. They are the best in cake baking, cake decorating supplies and ideas. They conduct these classes in many of the local stores. The classes are programmed by Wilton and the instructor is trained and asked to follow the process that's is set by Wilton.


What will you learn ?

Basically Wilton cake decorating classes come in 4 levels. It goes from basics to advanced. First one being basic, here you will learn
  • tips to perfectly bake your cake, techniques to store cake, how to cut cake
  • how to make icing, what are different consistencies for icing and what to use when
  • make different flowers, make leaves, rose flower, using the most popular star tip and what all we can do with it, borders
  • decorating cupcakes
  • drawing pictures on your cake, writing on the cake (use of piping gel for this)
Isn't that enough for a newbie like me. The stuff you learn in basics class is not hard and can be learnt easily at home. But then who will motivate you to do this at home :) :). I know there are hand full of girls out there who can do this at home as well but it was  sheer fun for me to go there, look at other's decorations, their creations and then of course the value able tips that you get from the instructor.

How can one learn at home ?

I said this can be done at home because each class comes with a kit and a plan book. Kit is where you find all the tool you need and book is where you get to read all the instructions and then its easy...

Where are these classes conducted ?

Search for these classes in any of the local craft store. Here at my place these are conducted by Joann and Michaels.

Tips for purchasing the supplies and enrolling in the class ?

All these craft stores have a huge coupon program. Some things you should do if you want to enroll in the class and also want to save some bucks :)

  • Subscribe for the coupons on the website of these local stores.
  • Go to the store and get the booklet of the classes. Here you might come across the discounts for the classes.
  • On some special days like "Open House" the class could be at half of its price. I was luck to grab this deal.
  • You always get 40 to 50% of coupons and always always use it towards your purchases of supplies. Saves a lot.
  • Find a partner. You can share your tools and help each other during the class.
During the class ?
  • Take pictures and videos for your future reference
  • Take pictures of the cakes decorated by others on the last day. You get to learn a lot from each of them
  • Try to reach to the class at least 10 minutes ahead of time. This is to good seats. :). I never made it :(
  • Ask questions to the instructor
  • Ask questions to your friends out their
  • And Have Fun .............. !!!!!!!!!!!!!!!!!!!!!!!!!!!!!!!!
Well here are some pictures from my class....
This one is by me :)

And here are by others.......


March 11, 2012

Vegetarian Thai Basil Rice


I am a great fan of flavors. And when I discover something that is new to me I desperately want it to try on my own. I know this does not happen all the time but the desire is always there ;). But this time I could make it happen. I prepared this dish in a week just later after I tried it.

Have you ever wondered using basil in cooking? At least I never thought of it until in the last week when I ordered this aromatic dish, Thai Basil Rice. Basil is one of the key ingredients and a must present ingredient in the Thai kitchens.


I simply love Thai cooking, the flavours and the ease with which it is prepared. Its quick , required handful ingredients and no extra or tiring preparation, yet tastes so good. As many of you know all the dishes in Thai cuisine use lots of vegetables. This makes it healthy. To add to this we have Tofu (which is a protein power pack).


When I started eating this dish I decided that I am definitely going to try this. It had so less ingredients and just the aroma of basil. I knew this is simple to cook. I searched (Binged/Googled whatever :)) and found out the key of this rice. First, it required the Jasmine Rice, which is abundantly used in Thai cooking. And this sure makes a difference as this rice had a different texture and had  a property to stick together but was not sticky. And of course the Basil leaves. In India we worship the basil tree but never used it in cooking. Often it is used in homemade medicines but never in cooking (at least to my knowledge, (I may be wrong)). Thai basil leaves are bigger than the Indian Basil. You can get these in any Asian store both rice and leaves.

Non vegetarian eaters can enjoy this rice with chicken and fish oil. Here is the vegetarian version :). And I am so happy with the outcome of my recipe.


Ingredients:

Jasmine Rice - 1,1/2 Cup
Fresh Basil Leaves - 20-25 (if they are full size) or three bunches
Tofu Cubes - 500 gms
Capsicum - 1 Cup, Julienned
Onion - 1 Cup, Julienned
Garlic - 4-5 cloves, minced
Green Chillies - 2, chopped finely
Salt - per taste
Soy Sauce - 1/2 tbsp
Oil - 2-3 tbsp
Cucumber for garnishing


The original recipe calls for using fish sauce but being a vegetarian I had to find something else. I searched a lot on Internet and found there are some vegetarian replacements available for the fish sauce. I remembered the taste of the rice and I decided to try out tamarind water :) And you know what, it worked very well .

Tamarind Juice - 1-2 tbsp

Method:

1. Rinse the rice before cooking. To cook Jasmine Rice add 2 Cup water to the rice. Add little salt. Bring it to boil and then reduce the heat to low, cover it with a lid and cook for another 15-20 minutes or till the rice is entirely cooked. Then turn off the heat and keep it covered for another 10 minutes. Keep it to cool.

2. Heat oil in a pan and shallow fry tofu till it turns a little brown. We need to do this so that the tofu cubes remain intact. Once done keep them aside.

3. Heat oil in a large skillet. Add garlic and saute a little. Then add onion for 1 minute and add capsicum. saute for another 3-4 minutes. Keep burner on high flame. Make sure the veggies are not overcooked.

4. Gently add tofu and basil leaves and stir.

5. Add Soy sauce, tamarind water and salt per as per taste.

6. Now add the jasmine rice and stir evenly.

7. Cover for 2-3 minutes. Garnish it with cucumber and serve.


Tips: 

  • @Veggie lovers - Make this more healthy by adding broccoli, carrots, snap peas..whatever veggie you like. :)
  • @Perfectionists - In the first attempt you will not get a perfect idea for the number of basil leaves to be used, which is OK. :) . Enjoy !!!!!!!!
  • @Non-vegetarians - use fish sauce and chicken.


February 25, 2012

Dal Baati (Oven Cooking)

                            Baati is a hard Indian Bread and is an authentic Rajasthani dish. Baati is usually cooked by deep frying and hence even being my favorite I could not enjoy it a lot ...(you know the age of calorie consciousness ;) ). Well a very dear friend of mine shared this oven version with me which tastes as good as the fried version but not better than that. (Nothing beats the fried versions after all) ....

Baati is super filling food. Highly nutritious as along with wheat, lots of "ghee"  there is also intake of variety of dals. Its what we call "a complete meal". Bati is a favorite of all the Marwaris and its oftenly a wedding meal for them.


Ingredients:

To make Bati:

3 Cup Wheat Flour
1 Cup of Semolina
2 tbsp Clarified Butter, Ghee
2 Tsp Carom Seeds, Ajwain
Salt to taste
1 tsp Baking powder
Water for kneading

To make Dal:
This is where you can have any type of dals and there combinations.
Typically the Dal is made using 5 dals or else just Toor and Chana Dal. I am going to explain the 5 Dal recipe

Toor Dal: 1/2 Cup
Chana Dal: 1/2 Cup
Split Moong Dal: 1/2 Cup
Masoor Dal: 1/2 Cup
Udad Dal : 1/2 Cup
Garam Masala Powder : per taste
Red Chili powder : per taste
Salt : per taste
Lemon juice : per taste
Oil, Mustard Seeds, Cumin Seeds, Asafotida (hing), Curry leaves for seasoning
Chopped Coriander for garnishing

Some people do not like a particular Dal. You can increase / decrease the quantity used as per your liking.

Method:

Baati recipes:

1. Mix wheat flour, semolina, baking powder, Clarified butter (ghee), ajwain, and salt in a bowl.

2. Using water knead the flour to make a hard dough. The dough for Bati is different than that for Rotis. This is hard and you can see cracks in it. Once done, cover it for 1 hour.


3. After an hour knead the dough again. Preheat the oven at 350 degrees. Make small batis as shownin the picture form the dough. Place the batis on the baking sheet. Spread some Ghee
on top of each baati.

4. Bake the batis for atleast 15 minutes or till they are done from inside.


Dal Recipe:

1. Mix all dals and soak for and hour or two. Then pressure cook daals till they get cooked.

2. Heat oil in a skillet. Add mustrad seeds and once they crackle add asafoetida and cumin seeds to it. Then add curry leaves.

3. Immediately add Garam Masala and red chili powder and add the cooked dals.

4. Adjust masalas as per taste and add salt.

5. While serving you can have another round of temepring. But this is optional and I particulary avoid it as it brings extra oil in the meal.

Tips:

To enjoy this, break the baati into pieces, add dal and little Ghee and enjoy till it is hot.

February 6, 2012

Refreshing Pear-Berry Smoothie...Aha.....(and my 1st day at work)

                          Today was my first day at work and it was the day of orientation.From tomorrow I will be starting my work and will be part of a team. It feels good to be back in the industry. I am not sure how often will I get to write a post, but I want to be consistent and continue my blogging and I will be posting at least once a week.  The day of orientation was full of information about the company. What, who, where, how and everything one would like to know about the company. It was exciting, all day long presentations, videos etc etc....

Last Saturday I got a pack of Pears from Costco and you know how many of them come in a pack. :O..... Well many times the calculation of the fruits needed in a week is right but there is always a week when it goes wrong :(...And yes this was the week. Since the pears were getting little juicy I thought I should try a smoothie of it. You know...yogurt and fruits...Well then I remembered that I had some frozen berries and I thought it would be great to add some flavor and color to the pear smoothie. So I added some berries to this. No sugar is needed as both the fruits add enough sweetness. Isn't that great....:)


Well this I would say is the simplest version of the smoothie but its first of a kind for me :).

Ingredients:

To make a glass of smoothie

Take 1 whole pear and cut into cubes.
Take 4-5 berries, frozen
Take 1 tbsp of Curd

Method:

Blend in all the ingredients in a blender and enjoy :). Add ice cubes if you like. Also you can add the small pieces of pear in the smoothie.

Looks Refreshing.....Isn't it ??? :)


February 1, 2012

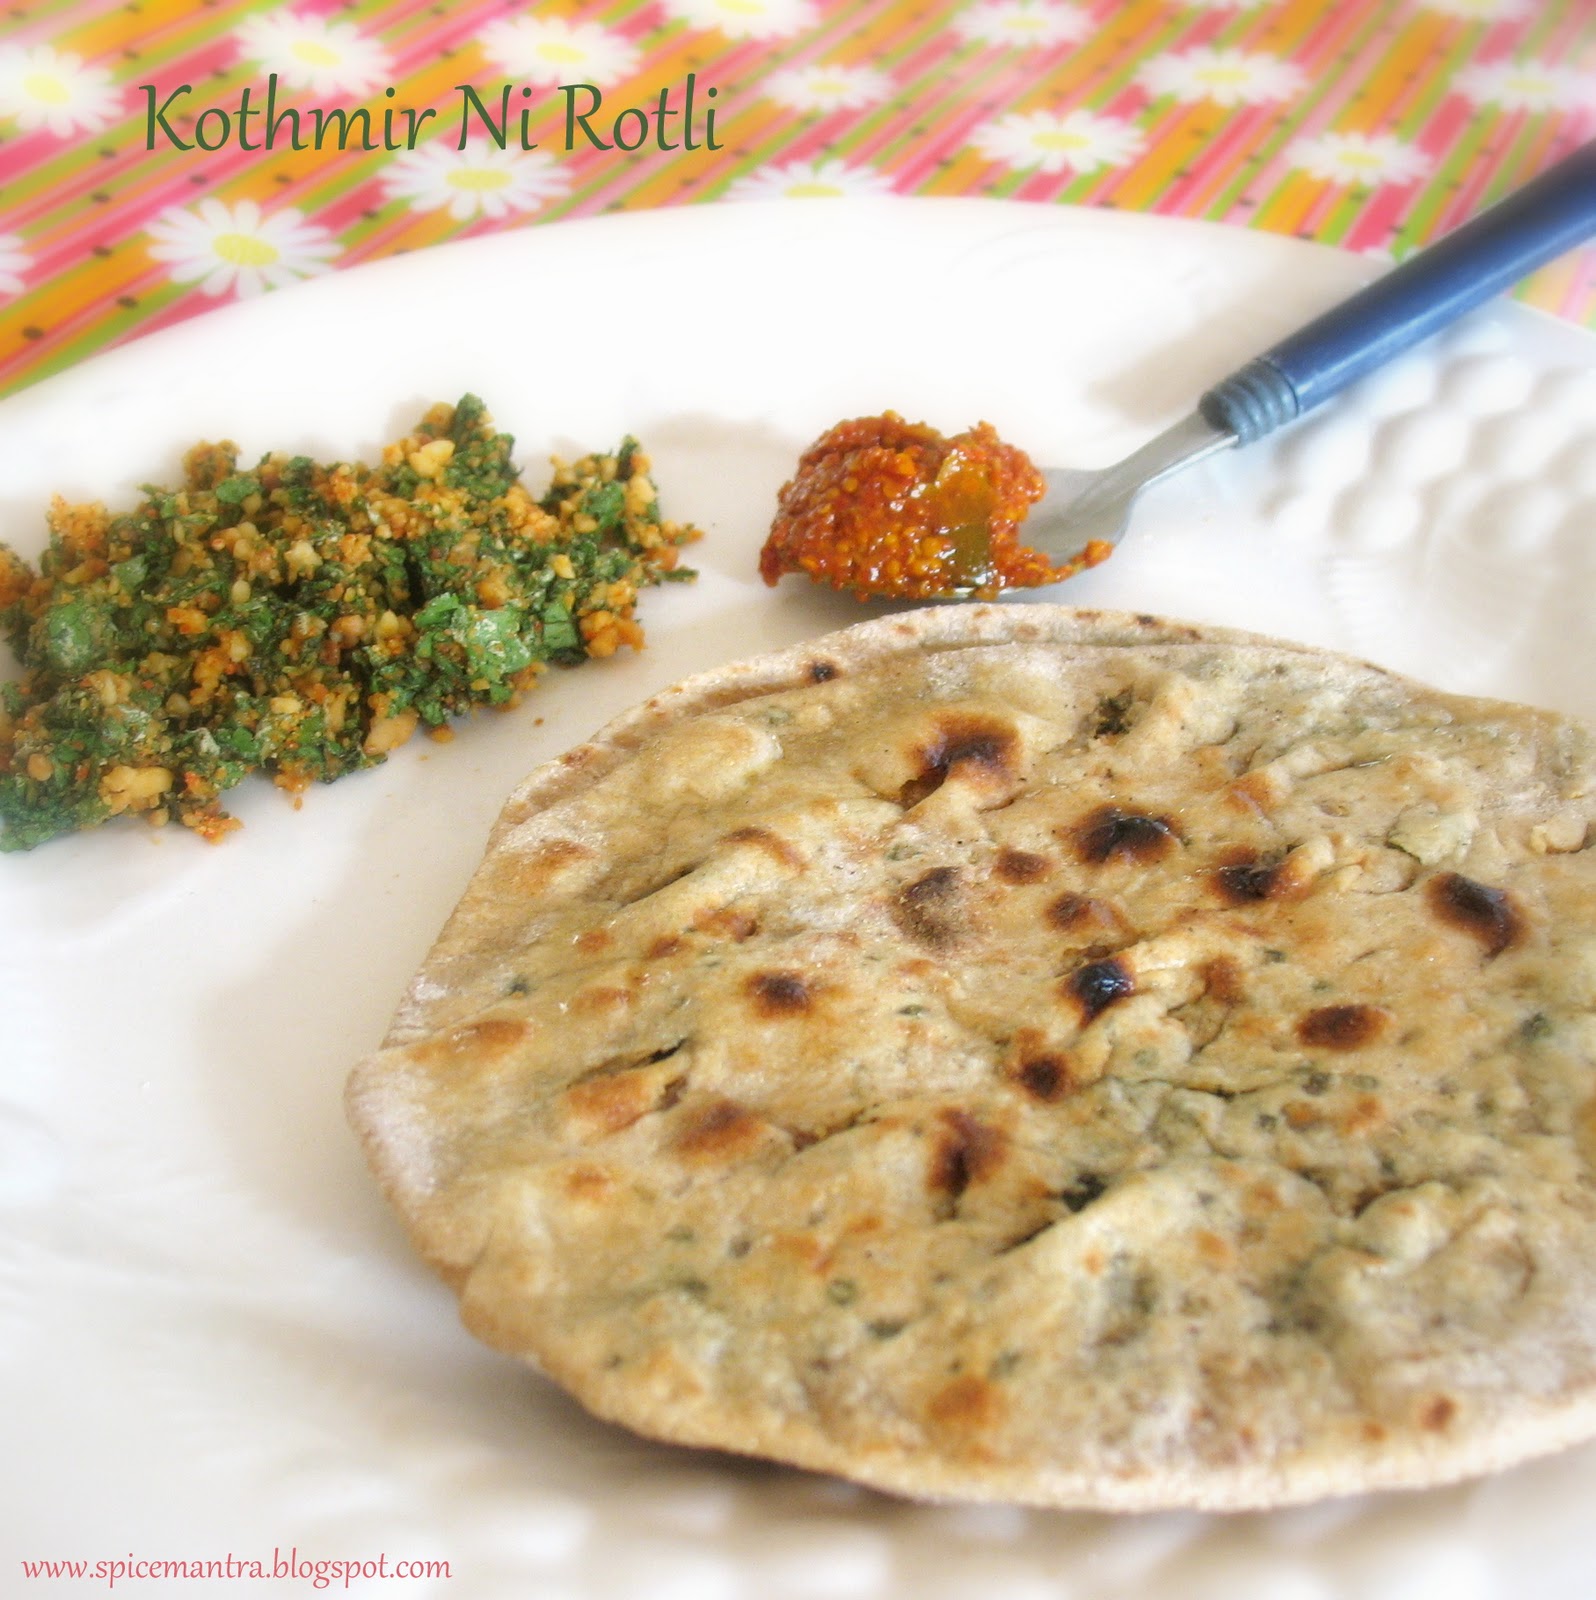
Coriander / Cilantro Paratha (Kothmir Ni Rotli)

                          Its been 2 and half years to my marriage. Besides family I still miss and remember so many other things from my family and my home. There is this endless list that goes on and on when I become nostalgic and kinda emotional ...you know. But these emotions do not bring tears but bring smile on my face. After marriage you walk with a huge responsibility in your new home and before marriage it was rather a very care free wandering. It's the way the tradition is and life is and every woman sails in the same boat and with age things have to change :)..... (but why sometimes I ask my self)......Wellllll there is no answer to this.... :)

The point is I wanted to mention few of my favorite things which I remember a lot (you can call me materialistic , but yeah I have attachment to them :D ) ...

1) The big terrace which always gave a peaceful sight of the sunset

2) The most comfy Sofa ever in the living room. And the king like treatment received in front of the TV sets, lying on those sofas and mom bringing some garama garam stuff to eat. (That's really wonderful) :)

3)  Our bedroom which was shared by me, my sister and my brother. The unusual thing about this room was its color (total green) and its makeover actually (from an attic to a room and a way to it).

4) A biiiig place for Rangoli.. Every diwali I missed it, drawing rangolis with my elder sister. It used to be a total tiring but full of fun experience, I swear.

5) And lastly  "Mummy ke haath ka khana" :( . I miss that a lot. I have tried to copy many of her recipes here. But still I could not have that taste in some of the dishes. There are some favorite dishes which are always on the menu list whenever we visit her. DahiVada, Tomato Omelet, "chakolya" , Dudhi Kofta, Daal Bati, Simple Daal and Rotli, "Matki", Pepper rice and many more...

The Coriander Paratha recipe also belongs to the same list. Absolute simple, healthy and really yummy. I am sure everyone will like this, unless he/she doesn't like Coriander at all. If you have dough ready at you home this will be done in no time. The roti tastes great with simle "kadhi". I will be posting the recipe for this. But you can find it online.

The only steps to make the stuffing are to chop the corriander and add few ingredients to it.


Ingredients:

For Stuffing:

Fresh Corriander - Chopped
Roasted Peanuts - Crushed
Gram Flour (Besan)
Salt - per taste
Red Chili Powder - per taste

I am not giving the quantity here as its way easy to make this. Wear you thinking hats and try it out. The stuffing is also shown in the pictures which can give you a brief idea.

For Dough:

To make 5-6 parathas use 1 Cup of wheat flour

Salt - per taste
Oil 1 tsp
Water

 To spread on top of roti:

Ghee (Clarified butter)
Fresh Lime Juice


Method:

1. In a bowl take the wheat flour, add salt and oil to it. With the help of water knead the dough as usual. Set aside for atleast 15 minutes.

2. Prepare stuffing my mixing all ingredients listed in another bowl.

3. Take a ball of dough and roll it to make abut3 inch diameter of roti. Place the stuffing in the middle and get the edges together and close it to make a ball again.

4. Roll this into a roti of about 6 inches diameter. Take wheat flour to prevent sticking of the roti to the surface.

5. Cook the roti on a griddle, from both sides.

6.Then place it on a direct flame or heat.

7. Cook a little till  a few tiny black spots appear. Now the roti is done and place it in a plate.

8. Make a few pinches with the fingers to the roti. Spread Ghee and some lime juice over it.


Steps 5 and 6 are shown in here. The Stuffing is shown on the right side

Tips:

This  roti can be most enjoyed with a kadhi.

January 27, 2012

Alepak Poha - Ginger flavored Beaten Rice Snack

After you get married there is a lot of change in the food that is being made in the in-laws family. In fact you get surprised to see some of the food items which you used to have for breakfasts are eaten as main courses and some of the main courses are cooked for breakfasts. That's really funny :) and  it takes time to get used to it. I am sure the girls who are married must have come across some food items which you do not like at all but still you had to prepare those. There are definitely some on my list and Alepak Poha ( Ginger flavored beaten rice ) is one from that list. It is because I am huge fan of the regular "kanda poha"  and this version will never ever beat it.
But again your taste buds get used to such dishes and after a while you start liking them...Isn't it?
Yes even I started liking this version of Poha and its not that bad. It has lots of ginger in it which makes it good for digestion.

Ginger is known to be taken when there are problems related to the digestive system such as indigestion, gas pains, diarrhea and stomach cramping. People in US also drink Gingerale when there is similar problem.

Ingredients:

Serves 2-3

Beaten Rice - 3 Cups
Grated Ginger - 3 tbsp
Jaggery (gud) - 2 tbsp, grated
Grated fresh coconut - 2 tbsp
Crushed Roasted Peanuts - 2 tbsp
Green Chili paste - 2 tsp
Fresh lime juice - per taste
Curry Leaves - few
Mustard seeds, Cumin seeds and oil for seasoning
Hing or Asafoetida - pinch
Salt - per taste


Method:

1. Wash poha / beaten rice in drainer/siever, drain the excess water c completely, leave it for 10 minutes. Use minimal water as possible.

2. Heat oil in a pan, add Mustard seeds, hing, curry leaves, green chili paste and grated ginger. Mix well for 30 seconds.

3.Add poha and mix well. Now add Jaggery and mix again. Cover for 2-3 minutes.

4. Add salt, peanuts crush, coconut and lime juice. Mix everything. Cover again for 4-5 minutes.

5. Adjust the jaggery, salt.

6. Serve.